Hello again! Parts one and two of this tutorial are done so I think it's time to move on to part three... the corset!
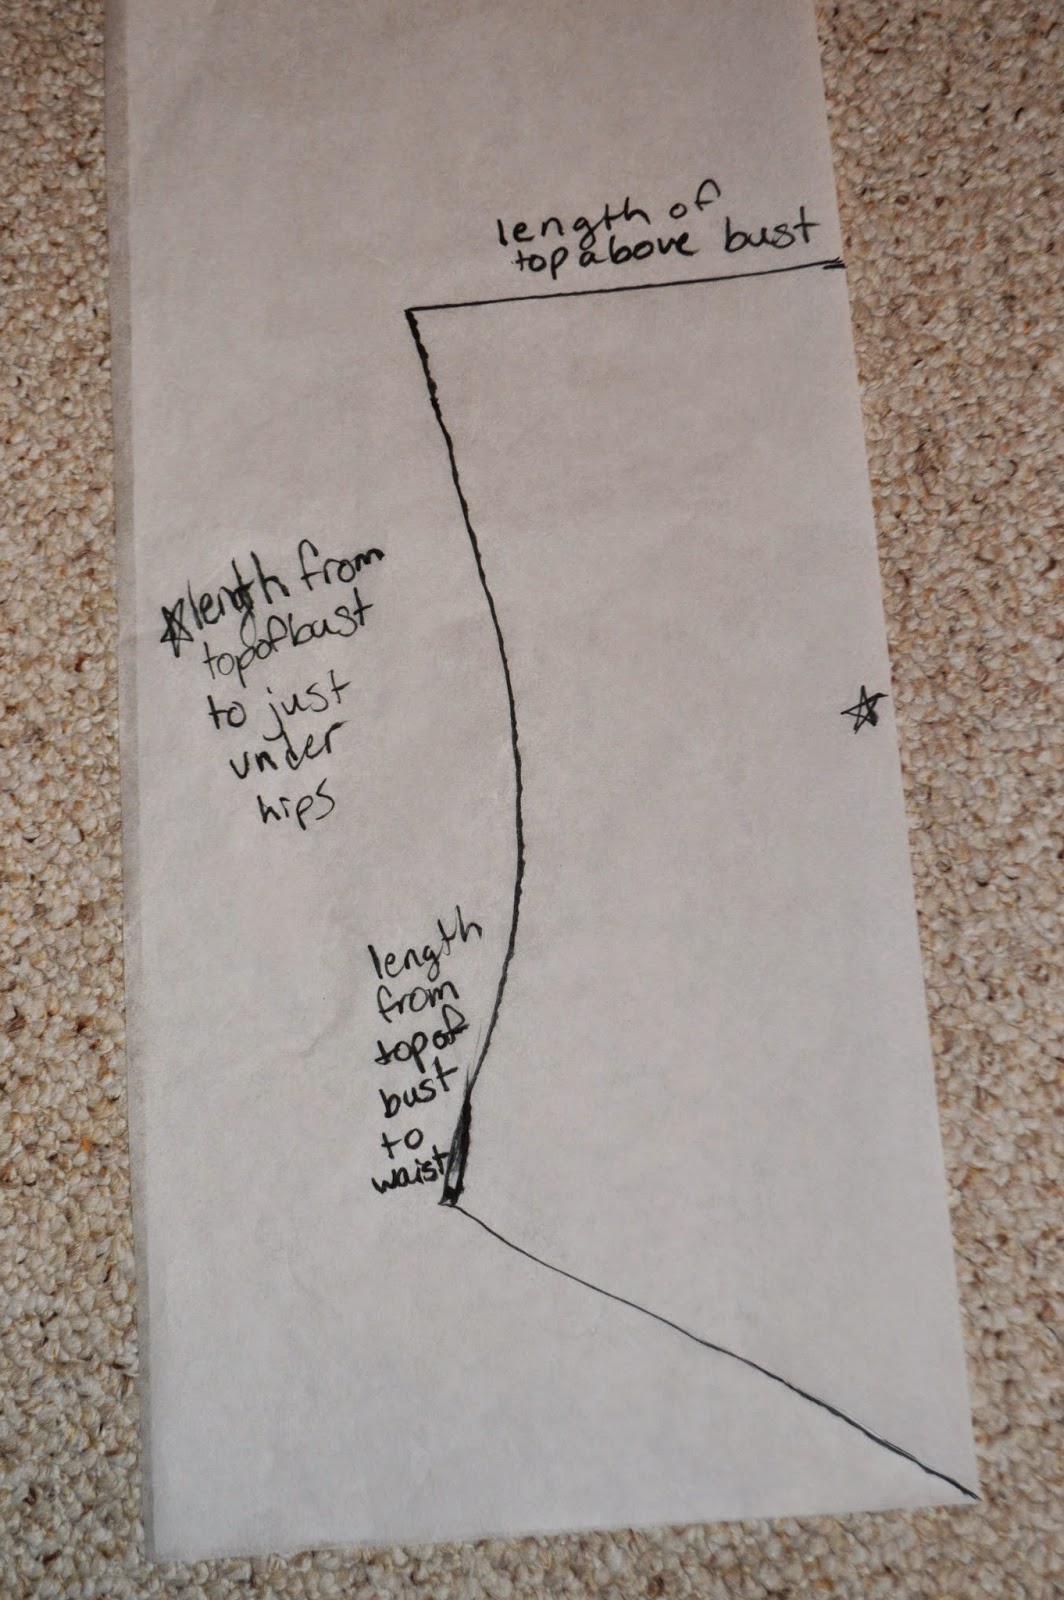
I drafted this pattern myself using tissue paper and a marker. I started by folding one piece in half and taking the measurements for the specific things listed in the picture below, which you can click on to make larger. Using these measurements, I drew my pattern (although I only used half of the above bust measurement since I was drawing a half pattern.)
I cut out my pattern and made sure that it would be the right size by holding it up to myself while looking in a mirror. As with most of what I do, this was trial and error. Luckily, it worked on the first try!

Then, using some of the remaining tissue, I used my pattern as a template for the side panels.

I cut out that piece and pinned it to my fabric, proceeding to cut out four panels. Since I was using corduroy, I had to be careful that all of the ridges were lined up the same way.


 |
| I apologize for the strange angle here- all of them are the same size, I promise! |


I was satisfied with how my pieces had turned out, so I pinned them together so the seams would be on the inside and tried it on.


You should end up with two identical panels on each side of the center panel (I forgot to get a picture representing this.)
I found that it fit absolutely perfectly, so I fired up my sewing machine and stitched away.

If you want to add boning and a lining to this (and you know how) this is most likely when you should. I decided against adding both for time's sake and my corset turned out fine because I have stiff fabric- it just doesn't tear me in half at the waist, which was OK by me!
I left the back open so I could add a closure- a zipper from an ugly old skirt.

Carefully, I folded over the raw edge of the fabric and pinned the zipper on the inside so that only the actual zipper part would show.


Anna's corset is rimmed with gold, so I took some thick ribbon from Michael's and pinned it around the top and bottom of mine.

A few minutes of sewing later, my corset was completely sewn up and ready for embroidery. I was pretty pleased with how it fit and everything... it even looked good on top of my Mickey Mouse pjs!


Anna's corset is decorated with a big rosemaling butterfly, as you can see above. I decided to hand embroider the butterfly, so I started by drawing a template on paper and coloring it with markers in the colors of the floss I planned to use and in a pattern for the stitches.


Then I sketched the same design on my fabric using tailor's chalk.

With the help of a lot of time, my grandmother's stash of embroidery floss, and an OTT lamp, I got it done... stitch by stitch. (I go back and forth between adoring hand embroidery and hating it. It takes so long...)


All in all, I'm extremely pleased with how it turned out!! I think it came out really well compared to what I was expecting (a big knotted mess.)
Here's the finished product front:

The shirt was a thrift store find, which I did not alter for this cosplay.
Here's the whole cosplay right now from the back:

Thank you all so much and I hope this continues to be helpful!
xoxo
MyLittleMegara
Wow, that is absoloutly amazing!
ReplyDelete~Kathryn
Thank you so much! :} <3
DeleteThis beyond amazing and beautiful! I'm sure it'll be very helpful if I do this cosplay. :)
ReplyDeleteThank you!!! I'm so glad! :D
DeleteThat looks so good!
ReplyDelete